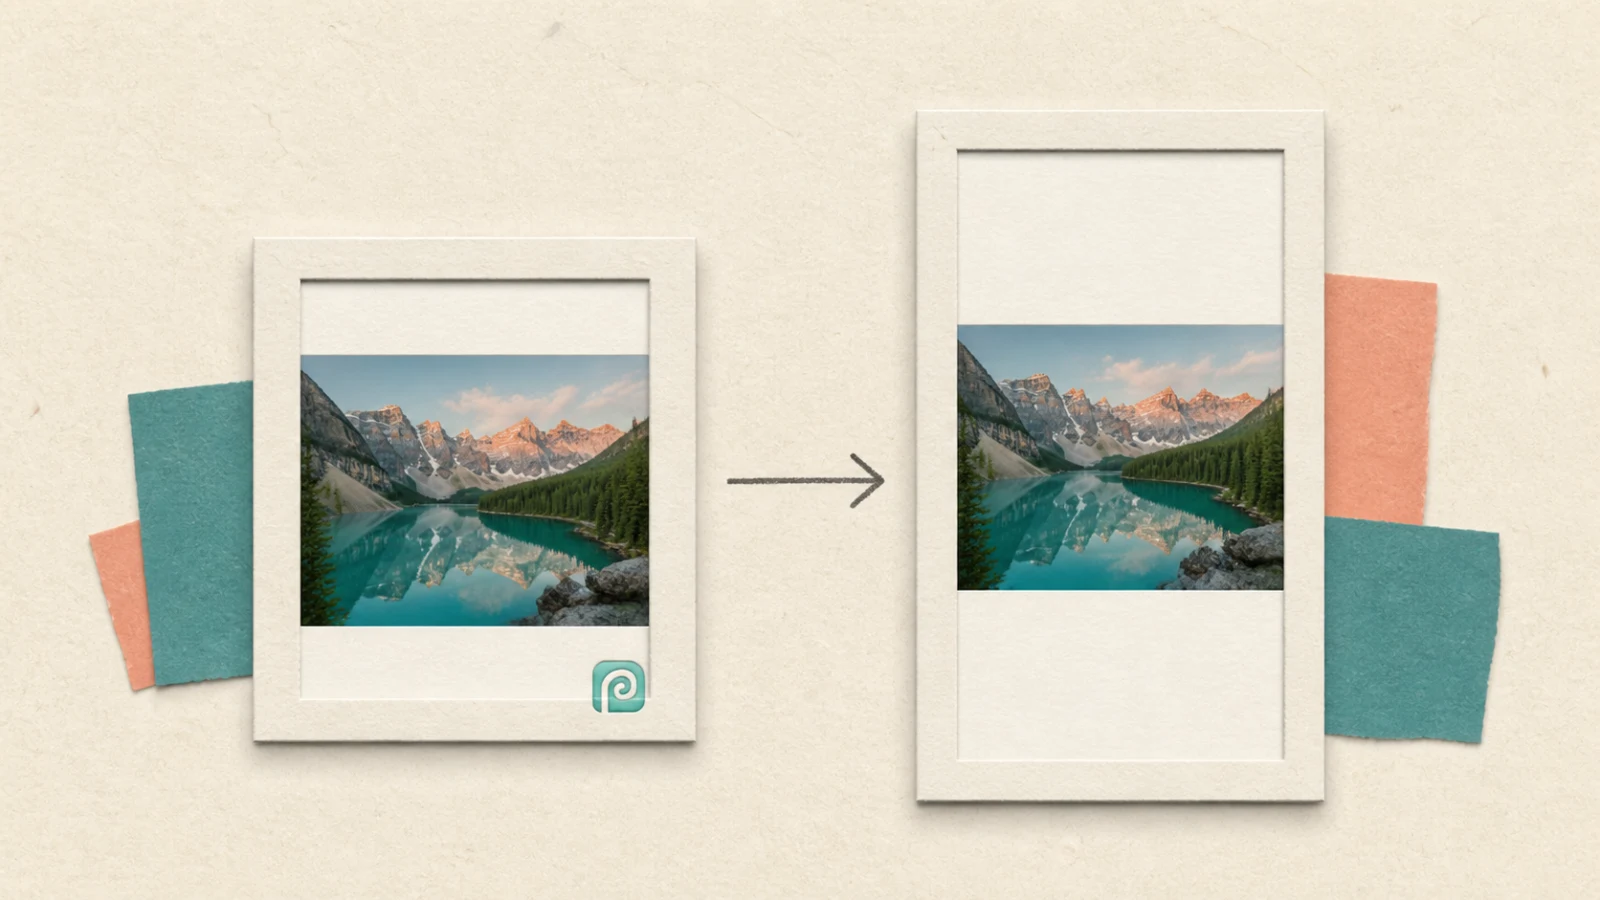
A photo can look fine on a phone and still fail when it has to fit a square post or a tall flyer. A face near the edge, a product label, or the end of an object may disappear when the frame is filled by cropping. The useful starting question is simple: what shape must the finished piece occupy, and does the whole picture need to stay visible?
This walkthrough keeps one public-domain 4:3 landscape as the fixed example. The same 1080 × 810 picture is placed into a square 1:1 canvas at 1080 × 1080 and a portrait 4:5 canvas at 1080 × 1350. The result keeps the scene intact, makes the empty-space trade-off visible, and checks the dimensions of both saved PNG files.
Start with the frame, not the crop
Use a self-owned or otherwise rights-cleared image. The public-domain landscape in this example is only a fixture; its rights status does not transfer to another photo.
Have the picture ready to paste, then open Photopea in a browser. The tested route used the anonymous free editor, with no account or payment step. A canvas is simply the frame around a picture: changing the canvas changes the space around the picture, while cropping cuts part of the picture away.
The two target shapes are a square 1:1 canvas at 1080 × 1080 and a portrait 4:5 canvas at 1080 × 1350. Keeping the same landscape for both makes the cost of each framing choice visible on the finished piece rather than confusing it with a different subject.
Make the square version
A landscape photo can lose a face, label, or edge object when it is forced into a square. A square canvas can keep the complete scene visible, but the trade-off is empty space around the photo.
- In Photopea, open
File > New. - Select the
Instagrampreset and confirm that the new document is1080 × 1080 px. - With the square document open, use the visible menu path
Edit > Pasteto place the photo. - Inspect the full scene before moving on. The complete left-to-right view should remain visible rather than being cut off.
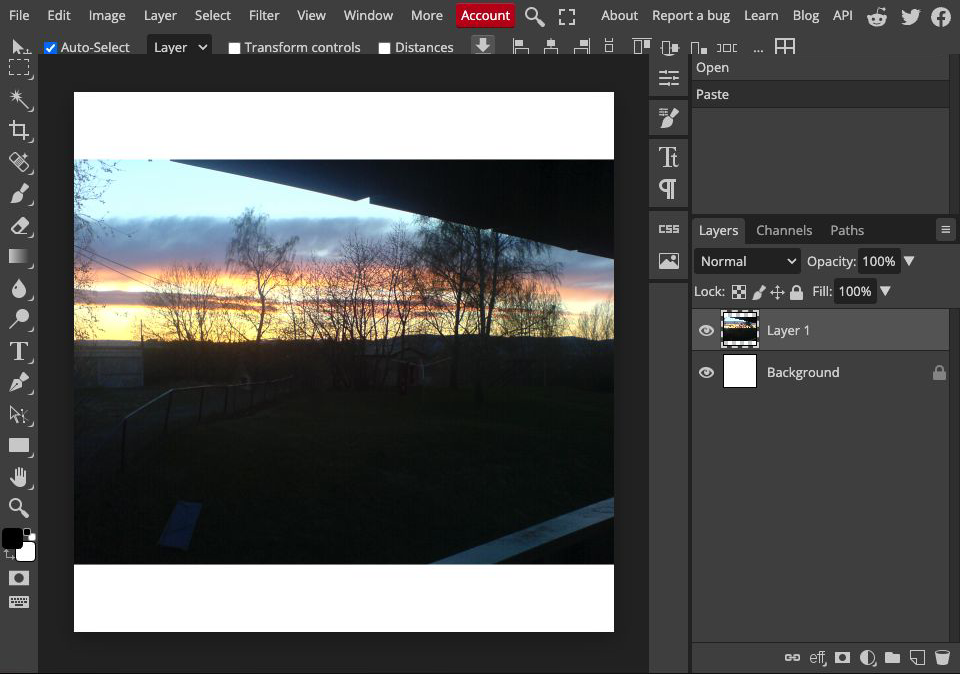
The square canvas keeps the full landscape visible and leaves white space above and below instead of cutting the scene.
The result is a square canvas with the scene intact and white space above and below. That is the useful choice when keeping an important edge detail matters more than filling every part of the square.
This approach is not a good fit when the design must be edge to edge and the blank area is unacceptable. In that case, crop the photo and accept the loss of some edge content, or redesign the surrounding space. The amount and appearance of the white space depend on the source ratio and how the photo is placed.
Make the 4:5 version and compare the frame
A taller 4:5 frame can keep the same landscape intact, but it makes the surrounding white space more visible.
- In Photopea, open
File > New. - Select the
Insta Portraitpreset and confirm that the new document is1080 × 1350 px. - With the portrait document open, use the visible menu path
Edit > Pasteto place the same full photo. - Inspect the top and bottom edges before changing the layout. The complete left-to-right scene should remain visible.
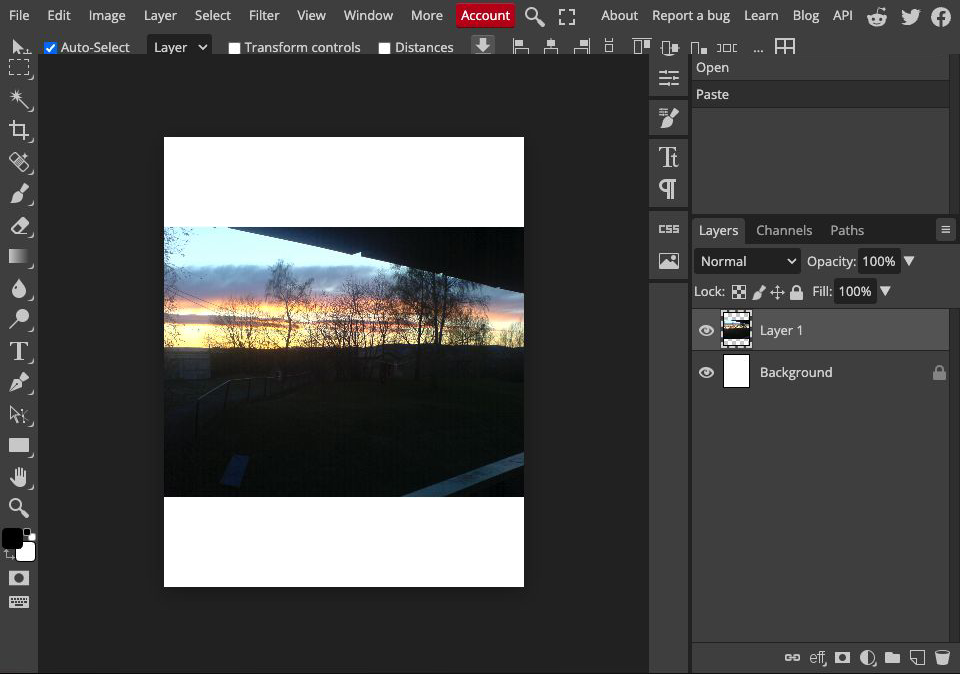
The 4:5 result keeps the same scene, but the taller frame leaves visibly larger white margins above and below than the square result.
The subject stays intact; the extra height becomes the visible cost. If that larger blank area competes with the message, choose a deliberate crop, background treatment, or different layout instead. Keep the 4:5 canvas only when keeping the full scene matters more than reducing the white space.
Export and check the saved files
When the framing is correct, export each canvas as its own PNG and verify the saved file, not only the canvas preview.
- Choose
File > Export As > PNG. Photopea opens theSave for webdialog. - Read the
WidthandHeightfields before saving. The square export should showWidth 1080andHeight 1080. The portrait export should showWidth 1080andHeight 1350. - Save or download each PNG, then inspect the local file's image information and compare it with the dialog.
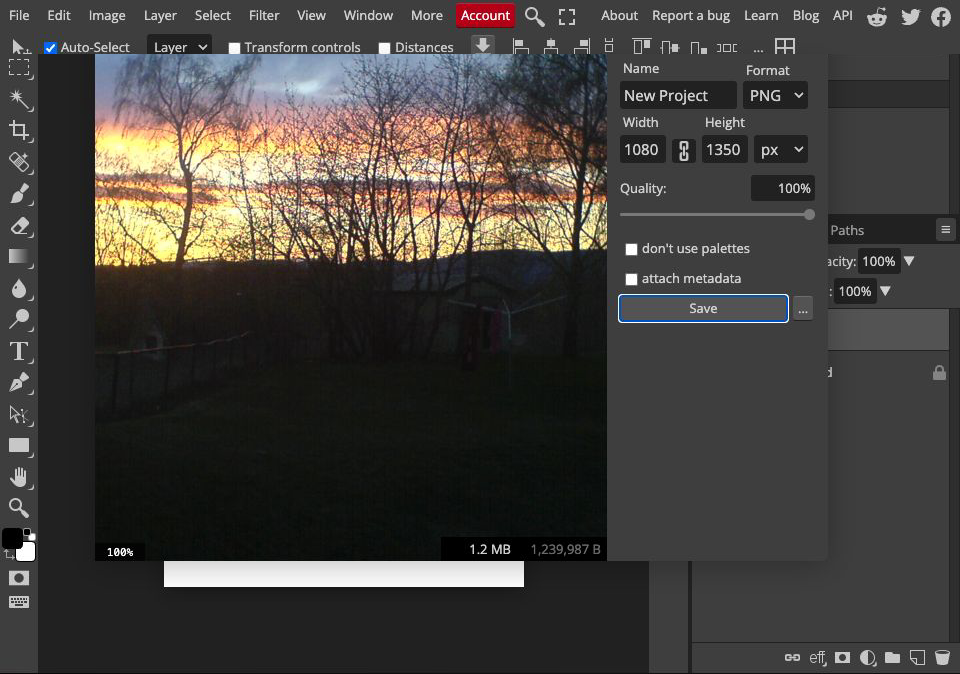
The portrait export dialog exposes the 1080 × 1350 target before the saved PNG is checked.
| Output | Export dialog | Local file check |
|---|---|---|
| Square | Width 1080, height 1080 | PNG, 1080 × 1080 |
| Portrait | Width 1080, height 1350 | PNG, 1080 × 1350 |
The two saved files matched their dialog values in the recorded check: the square file was PNG 1080 × 1080, and the portrait file was PNG 1080 × 1350. Treat the dialog and the downloaded file as separate checkpoints. The first catches an incorrect export setting; the second confirms what was actually saved.
Recover before handing off
- If the export dialog shows the wrong width or height, cancel the export. Return to
New Project, select the required canvas size, and inspect the framing again before saving. - If a local file does not match the dialog, discard that output and repeat the export and file check. A correct-looking canvas preview is not enough.
- If the full scene is not visible, stop before exporting and correct the canvas or placement. A file can have the requested pixel dimensions while still losing an important part of the picture.
- If the complete scene still does not fit the intended design, stop this route rather than handing off a dimensionally correct but visually unsuitable file.
Know the boundary of the check
Dimension checking answers one narrow question: whether the saved pixel dimensions are correct. It does not prove image quality or platform acceptance. A correctly sized PNG can still have an unwanted crop, background, format, or compression result, so inspect the actual picture before handoff.
The recorded path ran in Photopea's anonymous free editor without login or payment, with visible ads as the practical access trade-off. A numeric Premium price was not verified in the checked record and remains unknown. If the route now requires login, payment, CAPTCHA, or an export that cannot be dimension-verified, stop and re-check access before continuing.
Discussion
0 replies